We use essential cookies to make our site work. With your consent, we may also use non-essential cookies to improve user experience and analyze website traffic…
GLM-5.1 - state-of-the-art agentic engineering, now available on DeepInfra!
Containers
Documentation
Containers
Containers
Overview
GPU Containers provide on-demand access to high-performance GPU compute resources in the cloud. With GPU Containers, you can quickly spin up containers with dedicated GPU access for machine learning training, inference, data processing, and other compute-intensive workloads.
Key features:
- On-demand GPU access: Launch containers with dedicated GPU resources when you need them
- Flexible configurations: Choose from various GPU configurations based on your performance and budget requirements
- SSH access: Connect directly to your containers via SSH for full control over your environment
- Pay-per-use: Only pay for the time your containers are running
- Quick setup: Get started in minutes with our streamlined creation process
GPU Containers are ideal for:
- Machine learning model training and fine-tuning
- Running inference workloads that require GPU acceleration
- Data processing and analysis tasks
- Development and testing of GPU-accelerated applications
- Prototyping and experimentation with different GPU configurations
Usage
Web UI
Starting a New Container
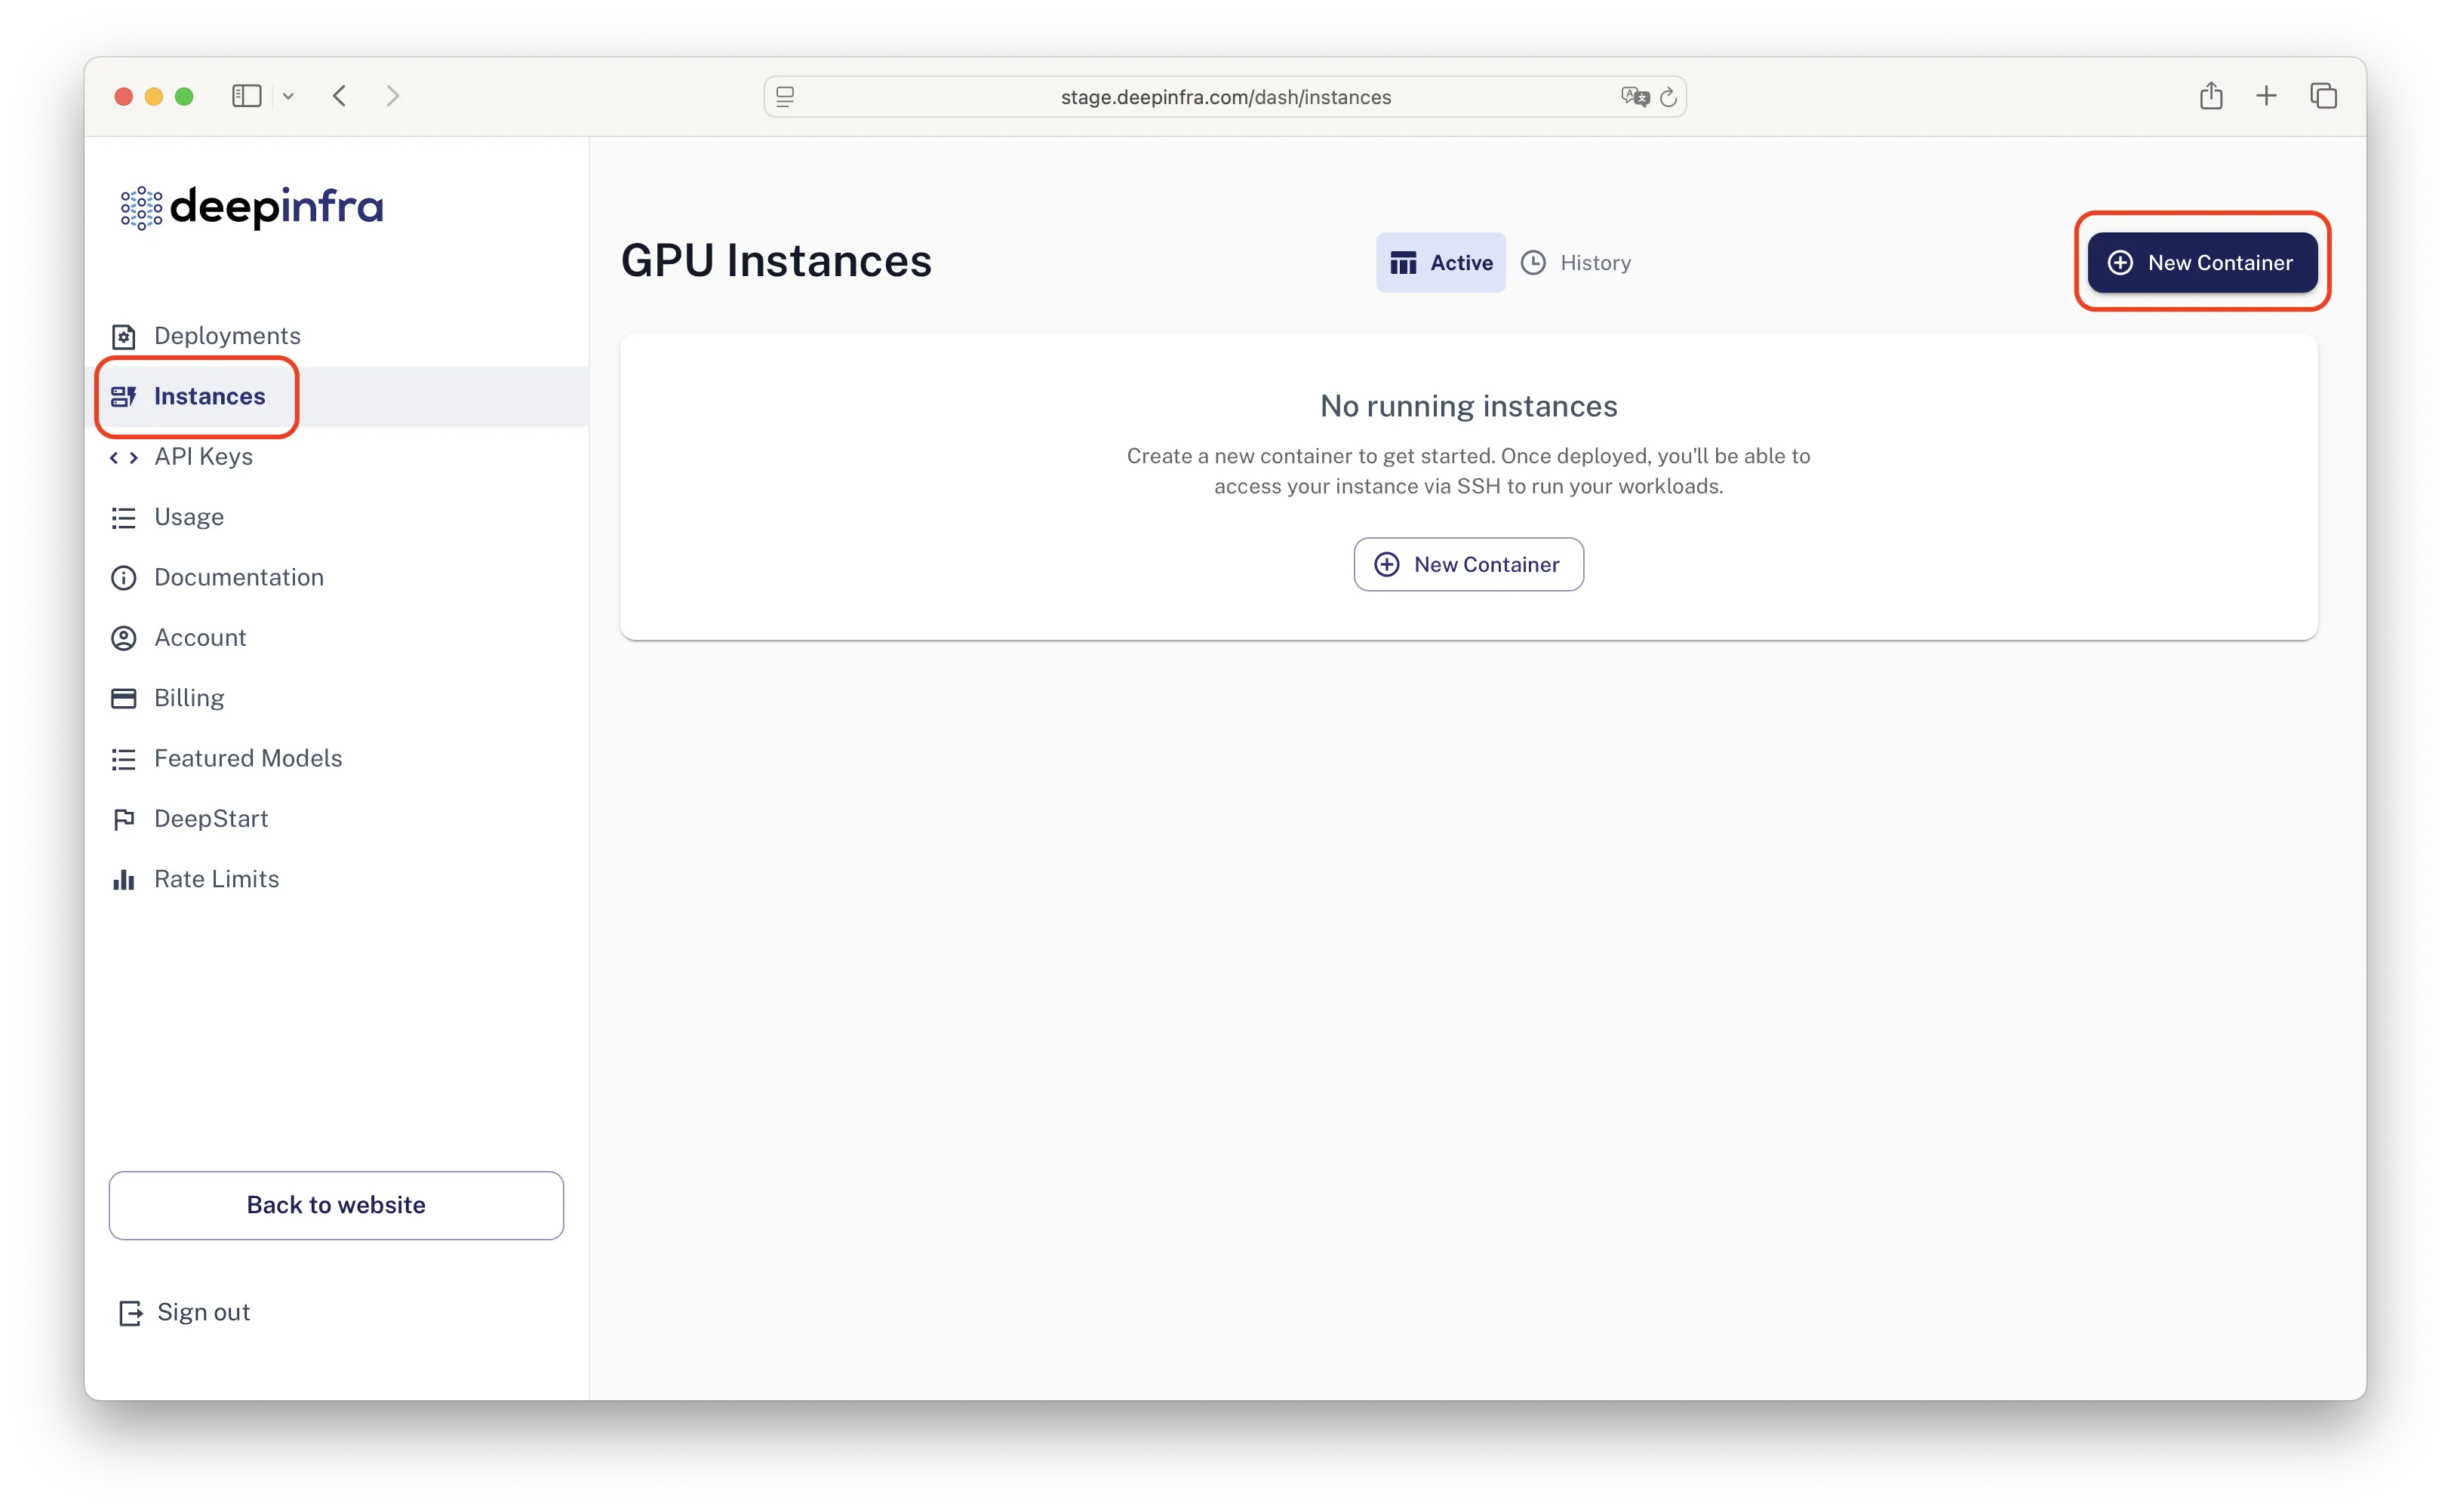
- Navigate to GPU Instances
- Go to your Dashboard and select "Instances" from the sidebar
- Click the "New Container" button
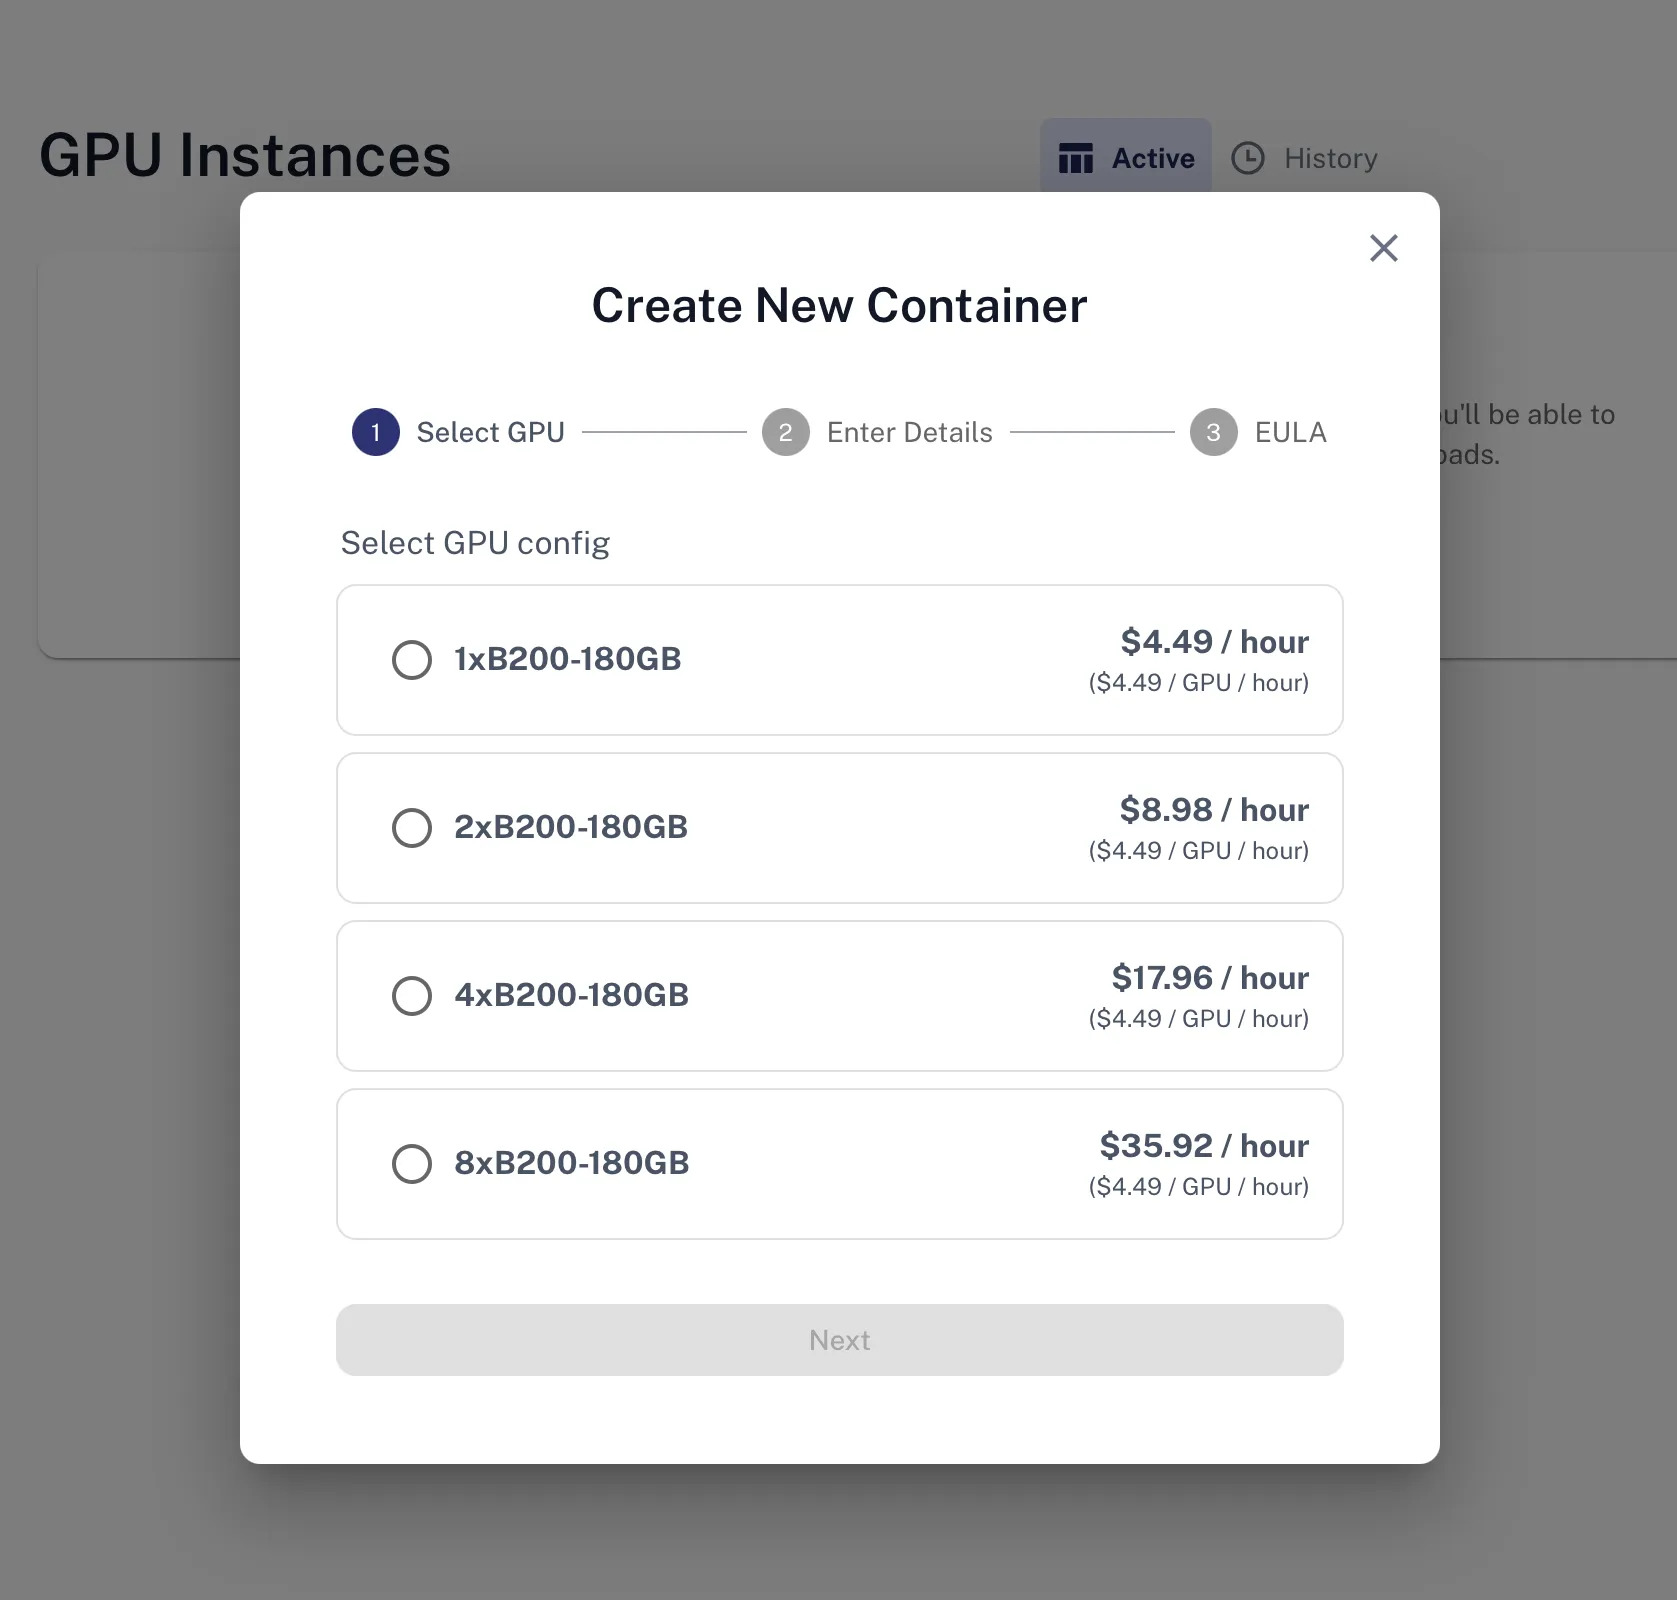
- Select GPU Configuration
- Choose from available GPU configurations based on your needs
- Each configuration shows:
- GPU type, quantity and memory (e.g., "1xB100-180GB", "2xB200-180GB")
- Hourly pricing
- Current availability status
- Configurations marked "Out of capacity" are temporarily unavailable
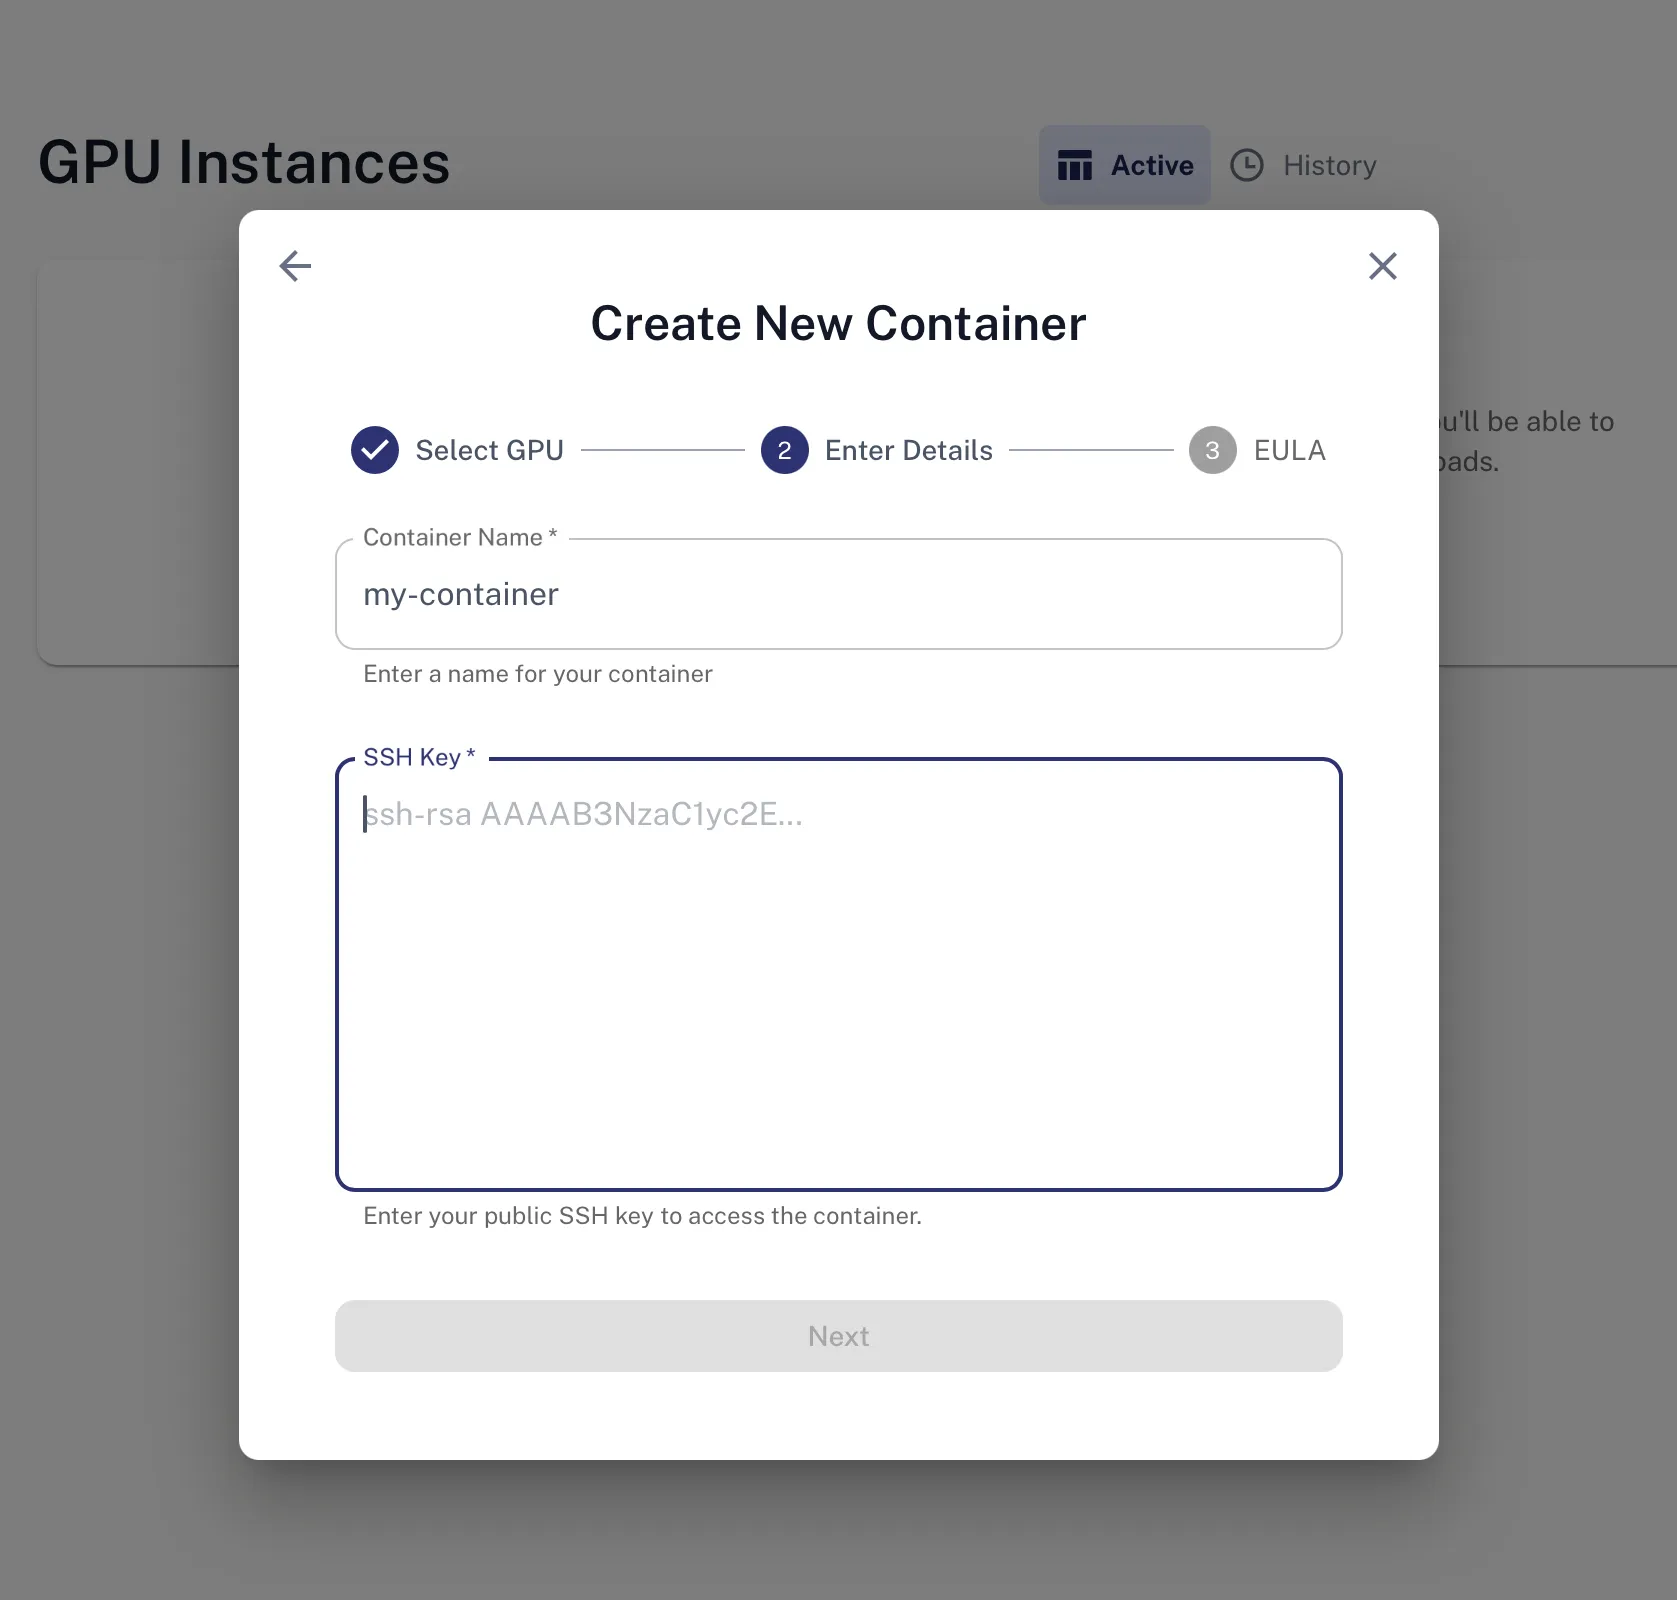
- Enter Container Details
- Container Name: Provide a descriptive name for your container
- SSH Key: Paste your public SSH key for secure access
- Use the format:
ssh-rsa AAAAB3NzaC1yc2E... - This key will be added to the
ubuntuuser account
- Use the format:
- Accept License Agreements
- Review and accept the NVIDIA software license agreements
- Acknowledge the cryptocurrency mining prohibition policy
- Click "I agree to the above" to create your container
Connecting to a Running Container
Access and Connect
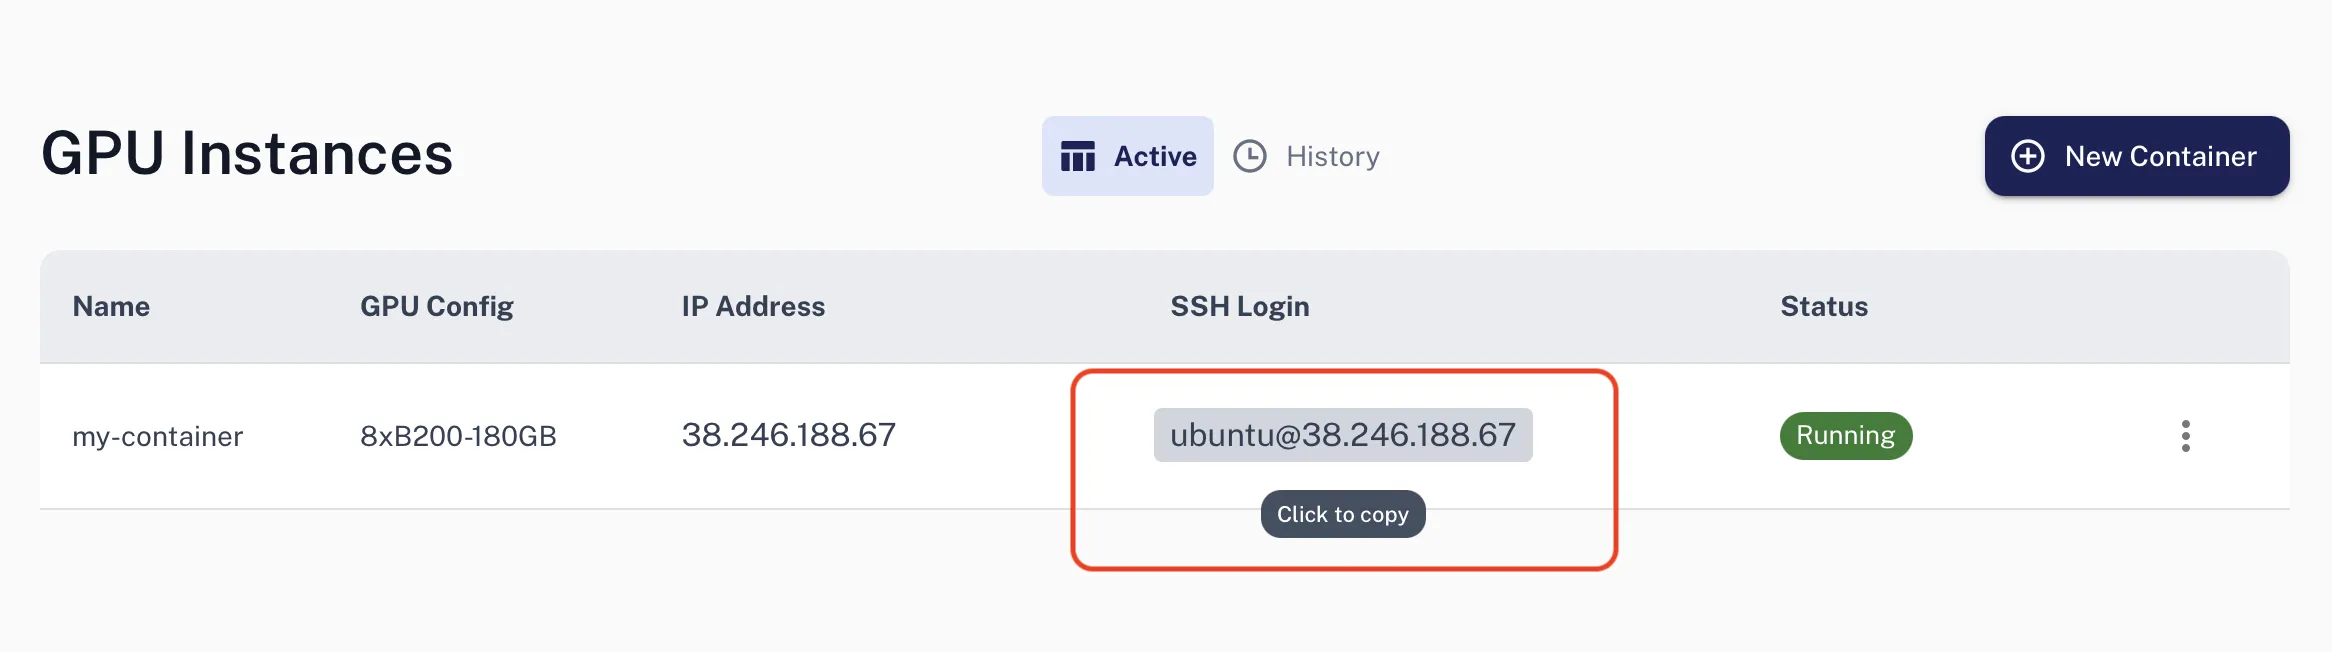
- Wait for your container status to show "running" in the GPU Instances list
- Click on SSH login field
- Open your terminal and run:
ssh ubuntu@<ip-address> - Your container is ready to use with GPU access configured
Stopping a Container
Terminate Container
- Click on the container you want to stop from the instances list
- Click the "Terminate" button
- Type "confirm" in the dialog and click "Terminate"
- Warning: All container data will be permanently lost
HTTP API
Starting a New Container
Create Container
curl -X POST https://api.deepinfra.com/v1/containers \
-H "Authorization: Bearer $DEEPINFRA_TOKEN" \
-H "Content-Type: application/json" \
-d '{
"name": "my-container",
"gpu_config": "8xB200-180GB",
"container_image": "di-cont-ubuntu-torch:latest",
"cloud_init_user_data": "#cloud-config\nusers:\n- name: ubuntu\n shell: /bin/bash\n sudo: '\''ALL=(ALL) NOPASSWD:ALL'\''\n ssh_authorized_keys:\n - ssh-rsa AAAAB3NzaC1yc2E..."
}'
Connecting to a Running Container
Get Container Details
curl -X GET https://api.deepinfra.com/v1/containers/{container_id} \
-H "Authorization: Bearer $DEEPINFRA_TOKEN"
Once the container state is "running" and an IP address is assigned, connect via SSH:
ssh ubuntu@<container-ip>
Listing Containers
curl -X GET https://api.deepinfra.com/v1/containers \
-H "Authorization: Bearer $DEEPINFRA_TOKEN"
Terminating a Container
curl -X DELETE https://api.deepinfra.com/v1/containers/{container_id} \
-H "Authorization: Bearer $DEEPINFRA_TOKEN"
Container States
Containers progress through several states during their lifecycle:
- creating: Container is being initialized
- starting: Container is booting up
- running: Container is active and accessible
- shutting_down: Container is being terminated
- failed: Container failed to start or encountered an error
- deleted: Container has been permanently removed


© 2026 Deep Infra. All rights reserved.